Dining Room Carver Chairs - Take 2

UKworkshop.co.uk

Help Support UKworkshop.co.uk:

This site may earn a commission from merchant affiliate links, including eBay, Amazon, and others.
Hi Mark

I chose the grain direction which would be stiffest. It just happened that this was also best for wedging (the risk of splitting is reduced). Shrinkage was never on my mind as all the wood is the same.

Regards from Perth

Derek
 
The Arms (part 2)


This is a last post before I return from three weeks being dragged over New Zealand mountains by my wife and her family. I used the Easter Weekend to get as much done as possible, but I needed a few more days. So there is more to come, later.

It is helpful to remember what the aim is - as close a copy of the DC 09 chair as possible. All guidance from photos ...


We left off here ...


The three parts that make up the arms and top rail ..


The top rails were shaped ...


And shaping started on the arms ...


Today the arms were begun.

I find it easier to do one part as far as I can take it, then stop and repeat this with another part. When all four arms have progressed the same distance, I start with the first arm again and take it to the next stage. Then the other three to match. And so on.

Each stage completed must be checked, and this is done by putting the parts together, to check that they balance. The two sides must remain a mirror image, and the two chairs must be identical. There are no templates to mark the lines to work towards, only the rough layout lines that appear fair to the eye.

The arms are shaped with rasps and spokeshaves ... mainly coarse rasps - the Shinto and a 10 grain Auriou - followed with round- and flat bottom spokeshaves. Starting with the inside faces ...


Inside faces mostly done ...


Inside faces almost done, except for the undersides ...


Further along - top inside and outside faces mostly done ...


And that's it for now. More later. Thanks for keeping me company through this build.

Regards from Perth

Derek
 
Comment on the grain direction

One point I have not drawn attention to, but was important for me, is the grain direction throughout this build.

If you look at the arms and legs, the grain has all been oriented so that the blanks are quarter sawn. For example, the arms will show the long side grain when looking at them from the side, as will the legs. The figured sides face the top, are carved away, and therefore the figure is minimised. The aim is to present a clear, uncluttered grain, and this should emphasise the shape/silhouette. This was not possible with the seat, and the figure was positioned as best as possible.

Regards from Perth

Derek
 
Last edited:
Back on the job after 3 weeks hiking mountain trails in the South Islands of New Zealand, then returning home with Bronchitis (although I was wearing a mask on the plane, passengers preferred to sit with the crying babies than listen to me cough and wheeze!). A few more weeks to recover. First day in the workshop this weekend.

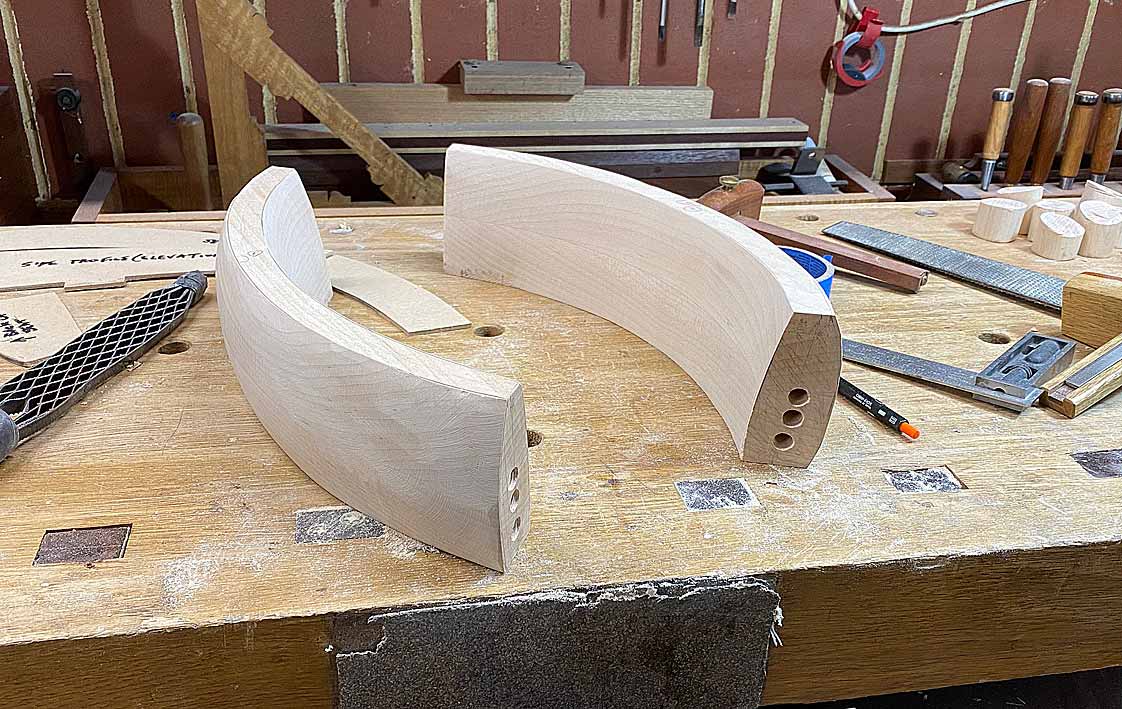
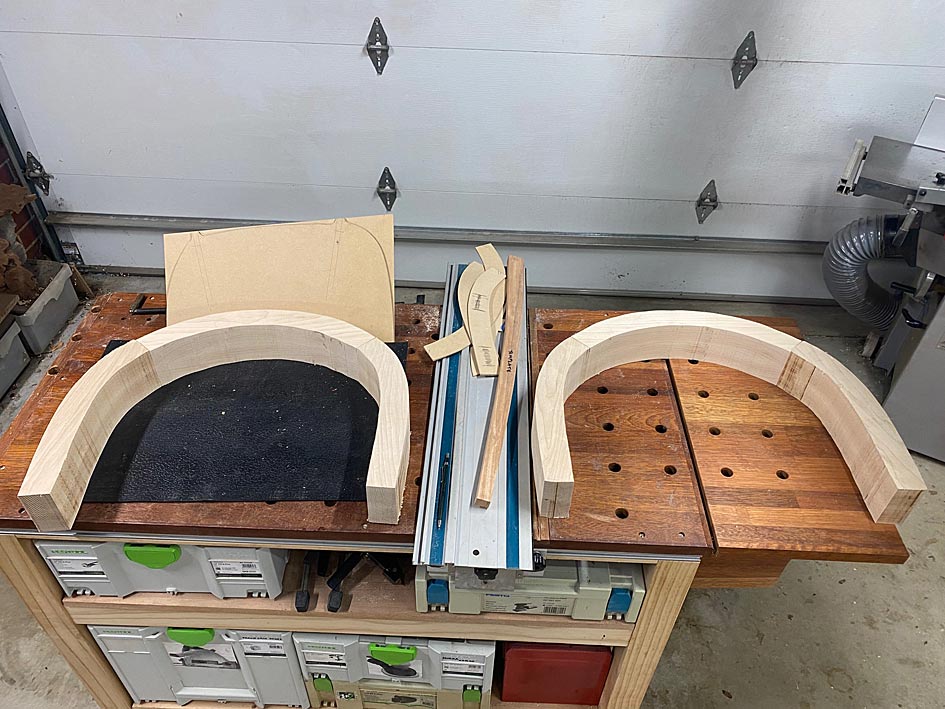
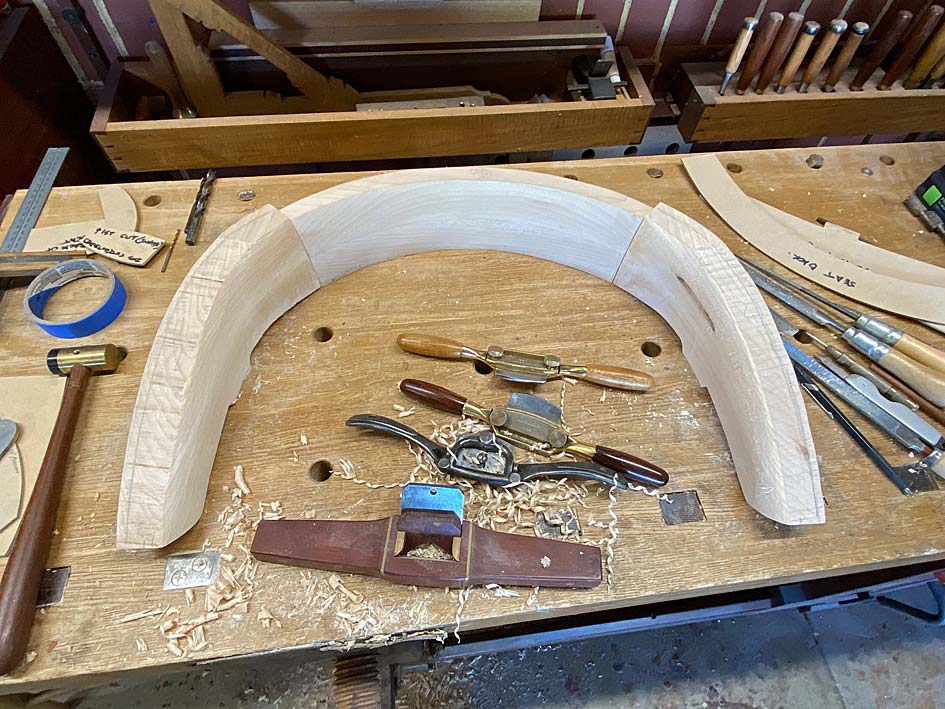
First task was to glue the arms sections together. You will recall that they are reinforced with dowels.


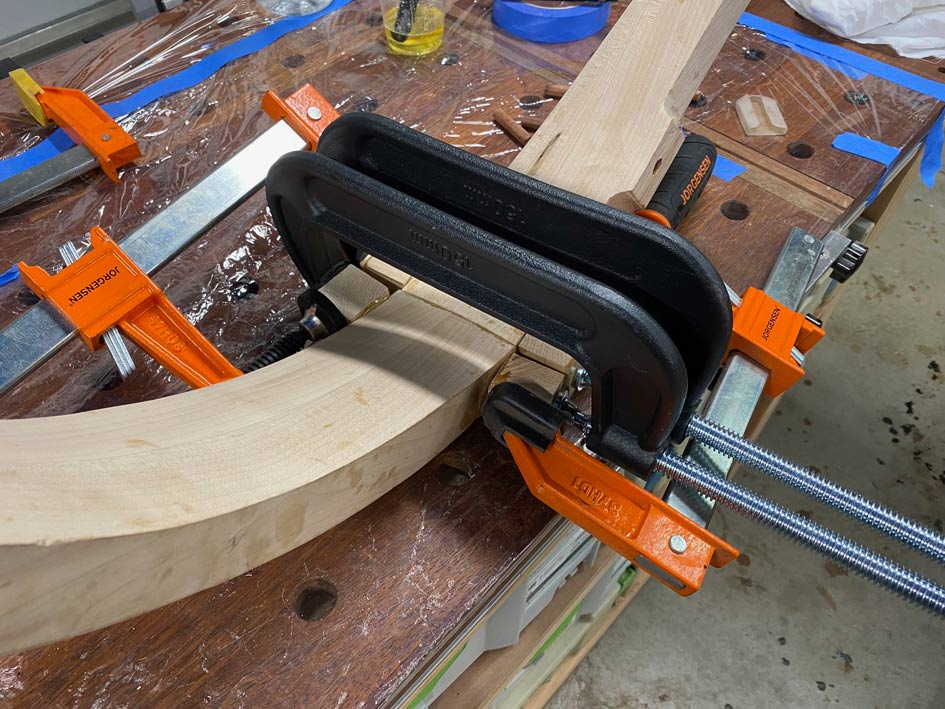
In a similar build, where the sections needed to be clamped together, it was possible to leave "ears" as the blanks were wider/thicker. I could not do that here, and so decided to epoxy these ears on ...


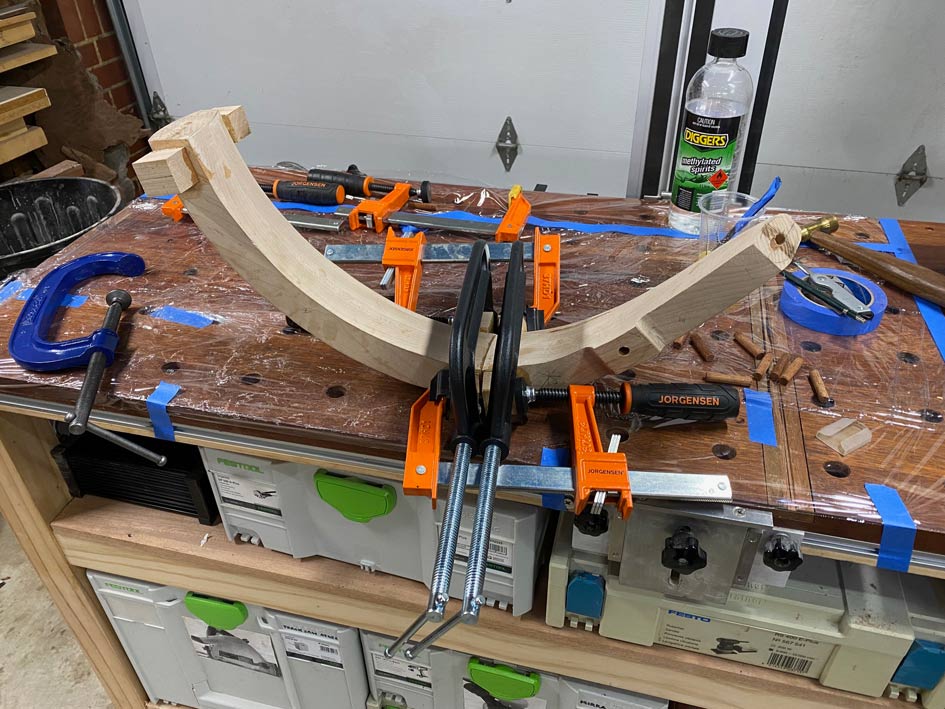
Well, it wasn't particularly successful, even allowing for 24 hours cure time. The ears broke off.

All I could do was clamp the ear on, and pray this would hold.


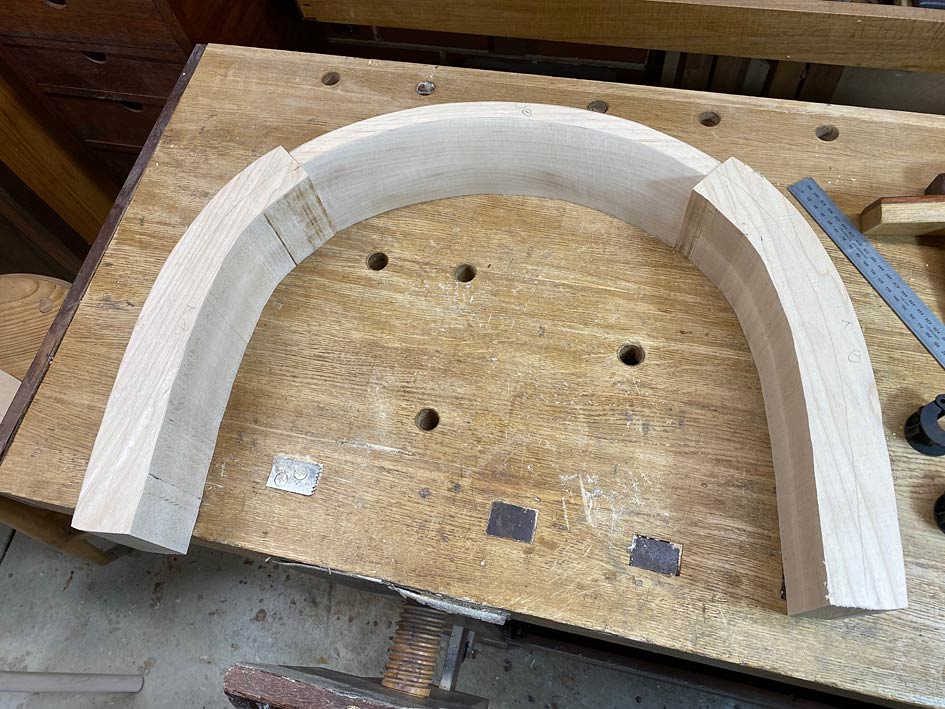
Later I realised that the problem was that the dowels I used were too tight, and the force needed to drive them home was unexpected. Lesson learned for all - if using epoxy, which is gap filling, the dowels has be a slip fit rather than a force fit. Of course, it would have been easier if I had known this beforehand!


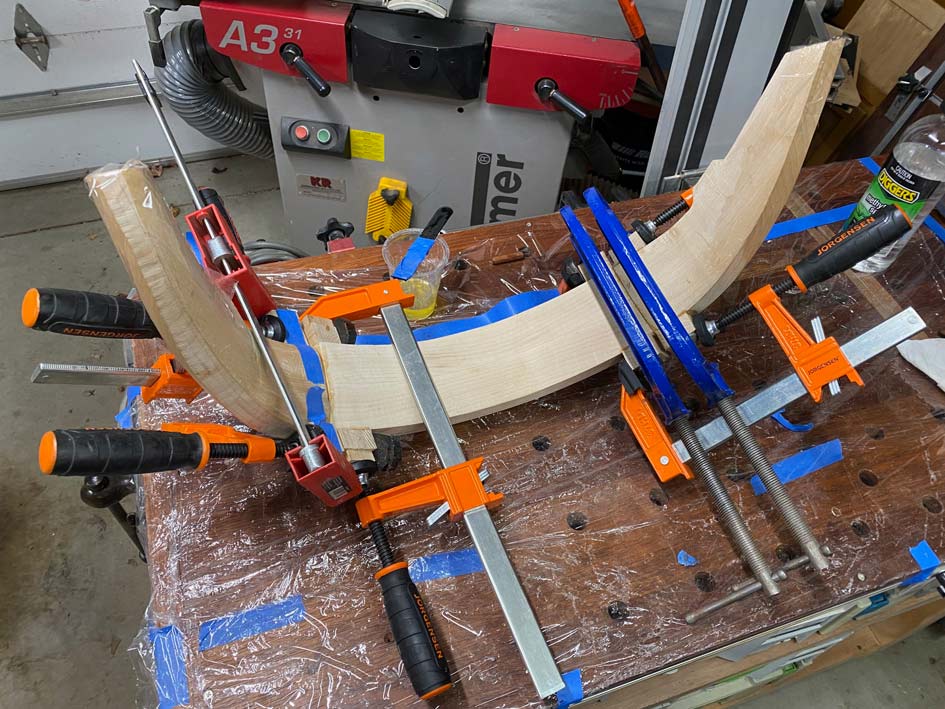
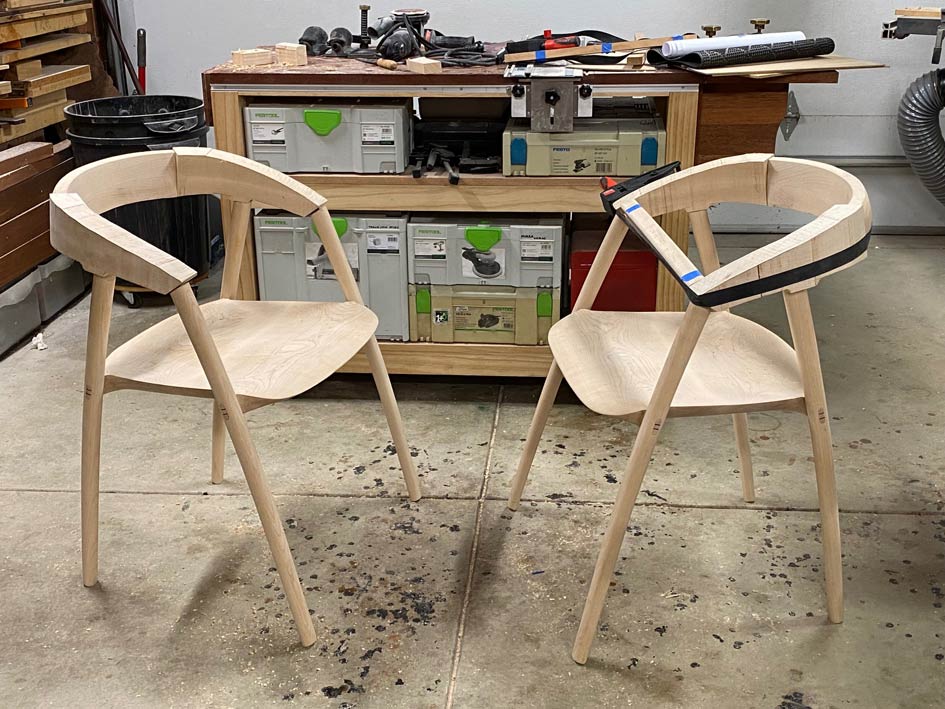
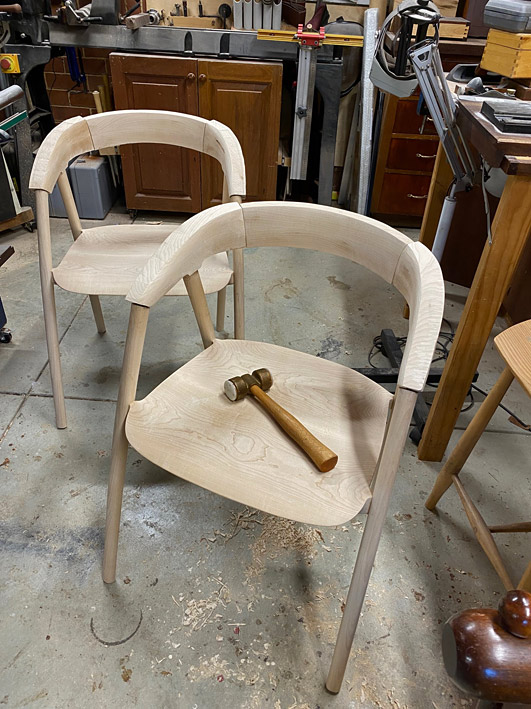
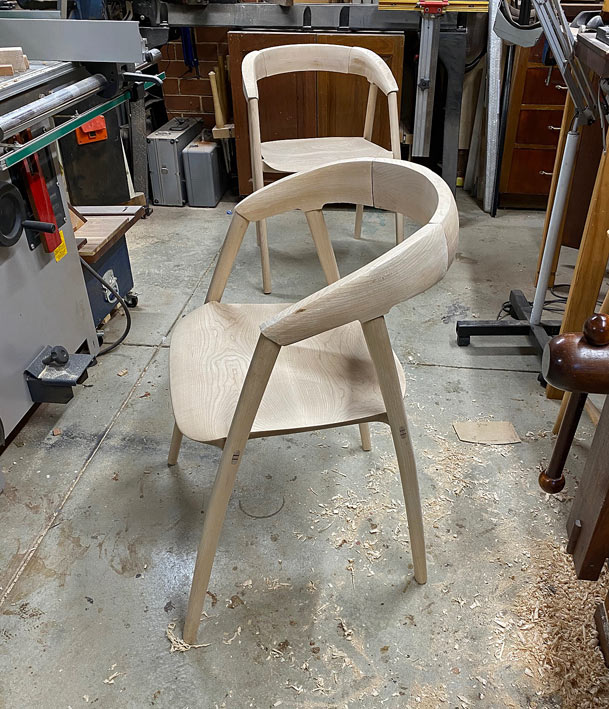
Once all was together, now in one piece (or two pieces if you count two chairs), the rasping and spokeshaving began ...


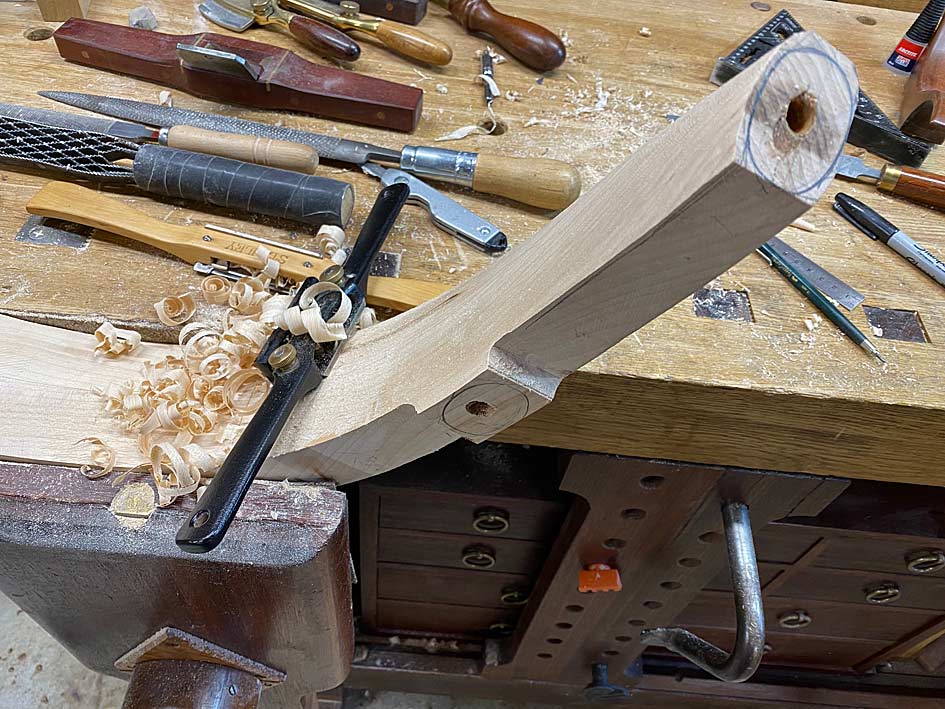
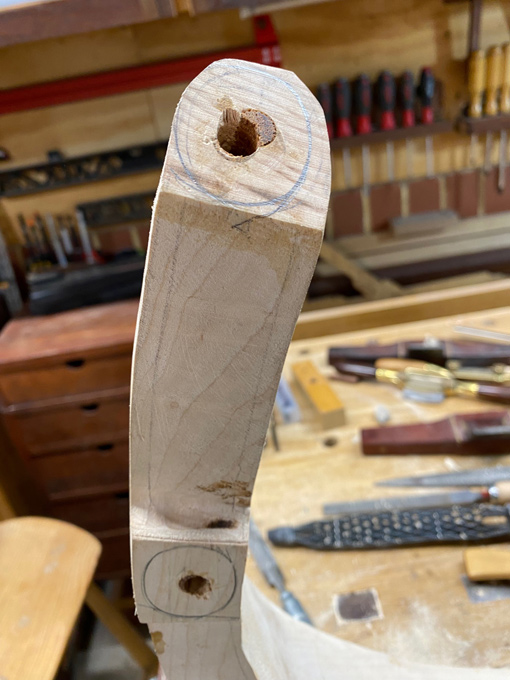
The aim now was to get the arms closer. This is all slow work, a bit here and a bit there, return to check the symmetry and shaping, and a bit more off. Work stopped to redrill the dowel holes that hold the arms to the legs. There had been a little movement while I was away, or I have measured inaccurately the at the start. It is important that the arms-legs join with as little stress to the joint as possible.


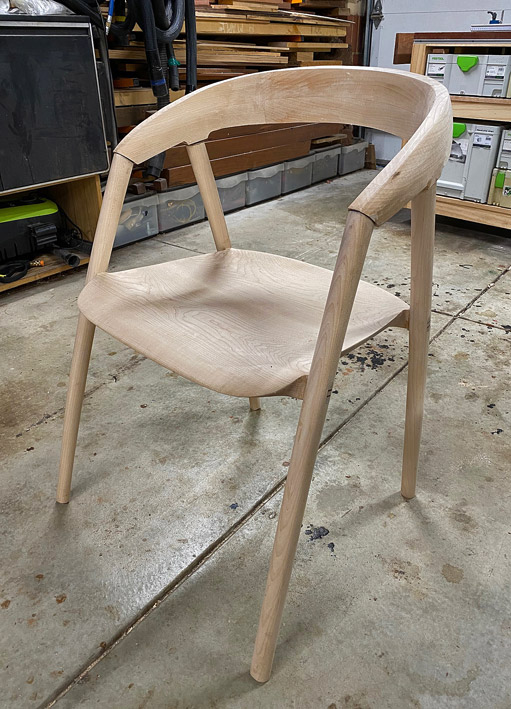
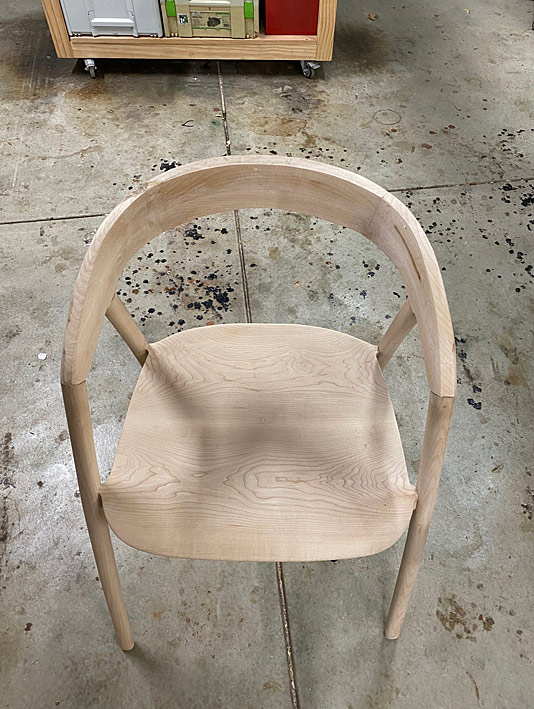
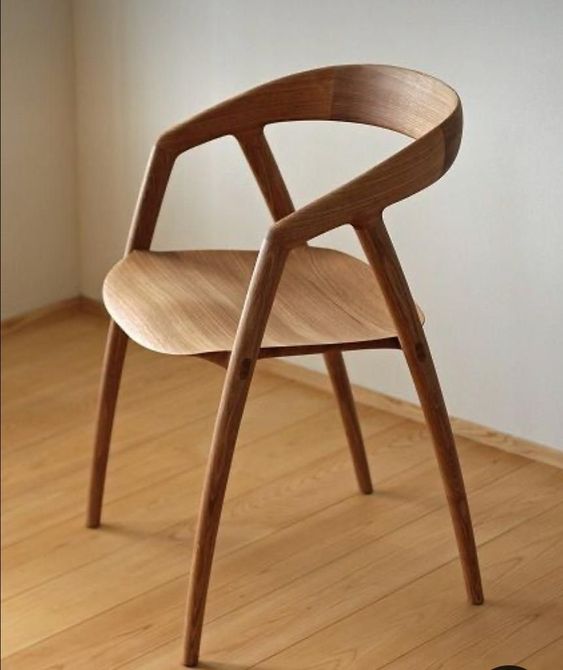
A couple of progress shots of shaping thus far - lots still to come, but its getting to look like the original chair now.


Regards from Perth

Derek
 

Latest posts

Back
Top